Login
Login
Shipping Country
Super CLEARANCE CAMPAIGN - Selected tools and accessories with Super Special prices! - CHECK HERE
READ MORE
Login
Quick guide to choosing the right planer bench size: Choosing the right planer bench is based on three factors: the square footage of your workspace, the length of the pieces you are working on, and your own height. Make sure there is at least one meter of free space around the bench and that its height is at the height of your wrists when you stand straight (usually 85–90 cm). A properly sized planer bench improves work safety, saves your back, and ensures a precise finish.
A planing bench is the absolute heart and most important workstation of any workshop interested in woodworking. It is not just a table, but a versatile tool that is used for precise joints, heavy planing jobs and delicate finishing work. Since a proper, solid wood planing bench is a long-term investment – ??often even a lifelong companion – it is worth choosing it carefully.
One of the most common mistakes is to buy a bench based solely on your eyeballs or the "yes, it will fit" principle. A bench that is too big makes the workshop cramped and a dangerous trap, while a bench that is too small or flimsy will frustrate its user as soon as they start working on even a slightly larger plank. In this article, we'll go over the most critical factors you should consider when planning the size and placement of your planing bench.
Before you browse the online store's selection, take out a tape measure and draw a clear floor plan of your workshop. The placement of your planing bench largely determines the workflow of the entire workshop. The bench should be located in a logical place in relation to your other machines. Timber usually comes to the workshop in rough form, so it is first cut and split. For example, high-quality band saws complete this work step quickly, after which the material is transferred to the planing bench for fine-tuning, jointing and assembly.
When measuring the space available for a bench, don’t just look at the dimensions listed on the planer bench’s cover. You also need to consider the clamps, or spindles, that are screwed open to their maximum position. The front and rear clamps, when opened, can increase the overall length and width of the bench by up to 20–30 centimeters each. If your space is really limited, consider a model where the clamps don’t protrude into walkways or choose a more compact bench model with high-quality, recessed mechanisms.
The evenness of the floor surface must also be taken into account. A solid planing bench needs a sturdy and straight base. If your floor is slanted or uneven, make sure that the bench you choose has the option to adjust the height of the legs or be prepared to make sturdy wedges under the bench. If the bench wobbles like a poorly assembled Midsummer bonfire, the result of the work will be the same.
What is actually being created in your workshop? If your passion is small jewelry boxes, miniature models or instrument building, you will be fine with a shorter and narrower bench. A planing bench about 1.2–1.5 meters long will provide just enough support and save valuable floor space for other activities. A small bench also has the advantage that it can be placed more easily, for example under a window, allowing natural light to fall directly on the workpiece.
If your goal is to build massive dining tables, doors, window frames or large shelves, the situation is completely different. Planing a long plank requires a long and, above all, heavy bench. If the bench is only half the length of the piece being worked on, the end of the plank will hang in the air and the center of gravity will shift dangerously out of the edge of the bench. In a long bench, over two meters long, the workpiece can be reliably supported along its entire length by bench dogs and a back clamp.
The importance of mass cannot be overstated. When you hand plan a thick plank, you are applying a significant amount of horizontal force to the bench. A light and wobbly bench will start to wander across the workshop floor with each push of the plane. A heavier bench will stay in place like bedrock, so all your muscular effort is focused on the wood you are working on, not on holding the bench in place.
Ergonomics is a factor that should not be compromised unless you want to suffer from constant back and shoulder pain. Traditionally, planing benches are designed quite low, because when hand planing, the working height must be such that you can utilize the weight of your upper body when pressing the plane. A rule of thumb for a traditional hand planer is the so-called wrist measurement: stand straight, relaxed, with your work shoes on and let your arms hang at your sides. The top surface of the planing bench cover should be at the height of your wrist joint. For most people, this means a working height of about 80–85 centimeters.
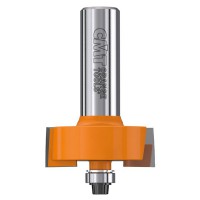
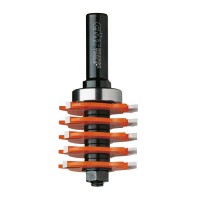
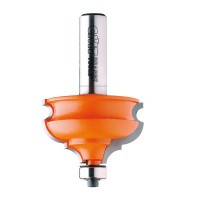
However, workshops today do much more than just hand planing. If you use your bench mainly for assembling, sanding, precise chiseling or machine work – such as hand milling, which uses precise milling cutter designs – a higher work surface will save your back. Constantly bending over a low table will quickly tire you. A more suitable working height for versatile general use is often 90–95 centimeters.
When choosing a planer bench , consider your own working methods:
One of the most common design mistakes is to place your planer bench tightly against a wall and leave too little room around it. Working safely requires that you be able to move freely and with balance around the bench without fear of tripping over obstacles. If your bench is crammed into a corner, you will soon find yourself working in awkward, unergonomic positions.
The ideal situation is to have at least one meter – preferably up to 1.5 meters – of free space in all directions around the planing bench. This allows for:
Cleanliness also plays a huge role in occupational safety. Wood dust and shavings make floors slippery, and when you have a rotating power tool or a sharp chisel in your hands, stumbling is the last thing you want. Make sure your workshop has adequate local exhaust ventilation. Efficient dust extractors keep the workplace environment free of sawdust and fine dust, which not only improves safety, but also the quality of the air the worker breathes.
In a small workshop, square footage is at a premium, so every piece of furniture needs to be harnessed for versatility. A planing bench offers a great opportunity to increase the storage capacity of your workshop. Many high-quality planing benches come with a sturdy lower cabinet or drawer system where you can place hand tools, chisels, measuring instruments, and glues in order.
The lower cabinet not only saves space elsewhere in the workshop, but it also makes the planer bench even heavier and more stable. When you fill the drawers with heavy hand planers and accessories, the bench's center of gravity drops lower, making it even more stable under heavy use.
Modern modular systems also allow you to place various storage boxes and tool cases directly under the worktop. For example, if you use high-quality power tools, such as the well-known Festool system, you can design the bench base so that Systainer cases slide neatly into place directly under the cover. This saves space on shelves and keeps the most important tools always within reach where you need them most.
However, remember to make sure that the base cabinets or drawers do not block the dog holes in the bench top. If you use long bench clamps or quick-release clamps, their arms may extend several centimeters below the top of the bench top. So leave enough free space between the top of the bench top and the cabinet top, or choose a bench model that has this taken into account in the design phase.
Choosing a planer bench is an investment you don't want to make in a hurry. When you consider the dimensions of your workshop, your own ergonomic needs, and the materials you're working with, you're sure to find a model that will serve you for decades. Here's a quick checklist to help you make your decision:
The right planing bench makes working smooth, safe and, above all, fun. When your workpiece stays in place and your tools are neatly within reach, you can focus on what matters most – creating great woodwork in your workshop!
100% Trustworthy online store with history
Expert customer service
Fast deliveries
Large selection directly from stock
No middlemen - save on the price






 Suomeksi
 På Svenska